
Cherry Blossom Dream Cake is a stunning dessert that captivates both the eyes and palate. With its delicate floral notes and luscious layers, it’s perfect for celebrations from springtime gatherings to elegant afternoon teas. Imagine slicing into a cake that not only tastes heavenly but also brings the beauty of cherry blossoms right to your table. Trust me, this cake will not just be a treat; it will be a talked-about centerpiece!
Why this cake deserves a spot in your kitchen
This delightful cake isn’t just a pretty face. One of the best reasons to try the Cherry Blossom Dream Cake is how easy it is to whip up. It doesn’t require any fancy techniques or hard-to-find ingredients, making it perfect for novice bakers and seasoned pros alike. It’s an ideal choice for birthdays, tea parties, or simply as a pick-me-up on a gloomy day. The vibrant flavor of cherry blossom syrup paired with creamy whipped frosting will surely bring joy, making it a sweet gift that everyone will appreciate.
The making of Cherry Blossom Dream Cake
Creating this cake seamlessly blends simplicity with deliciousness. The entire process includes mixing, baking, and frosting, ensuring that even novice bakers can achieve impressive results. You’ll find that the steps are straightforward, and the ingredients come together effortlessly, resulting in a magnificent cake ready to dazzle your guests.
What you’ll need
To embark on this creative culinary adventure, gather the following ingredients:
- 2 cups all-purpose flour
- 1 1/2 cups granulated sugar
- 1/2 cup unsalted butter, softened
- 1 cup milk
- 3 large eggs
- 1 tablespoon baking powder
- 1 teaspoon vanilla extract
- 1/2 cup cherry blossom syrup
- 1/2 cup cherry preserves
- 1 cup whipped cream for frosting
- Edible flowers for decoration
Feel free to try substitutions like dairy-free milk or vegan butter to accommodate dietary preferences!
Step-by-step instructions
Follow these clear steps to bring your Cherry Blossom Dream Cake to life:
- Preheat your oven to 350°F (175°C). Grease and flour two 9-inch round cake pans.
- In a mixing bowl, cream together the softened butter and sugar until light and fluffy.
- Add the eggs one by one, mixing well after each addition.
- Stir in the vanilla extract and cherry blossom syrup, letting the flavors mingle.
- In another bowl, whisk flour and baking powder. Gradually incorporate this into the butter mixture, alternating with the milk, until combined.
- Divide the batter evenly between the prepared cake pans.
- Bake for 25-30 minutes or until a toothpick inserted into the center comes out clean.
- Let the cakes cool in the pans for 10 minutes, then transfer to wire racks to cool completely.
- Once cooled, spread a layer of cherry preserves between the cakes, and generously frost the top and sides with whipped cream.
- Decorate with beautiful edible flowers before serving.
Best ways to enjoy your cake
To elevate your Cherry Blossom Dream Cake experience, consider serving it with a light fruit compote or a scoop of vanilla ice cream. Pair it with a refreshing herbal tea or a glass of sparkling lemonade to enhance the springtime vibe. For a more festive occasion, a drizzle of cherry sauce over each slice adds a touch of elegance, making your dessert not just a treat but a celebration in itself!
Keeping your cake fresh
Looking to save some of your dream cake for later? Maintaining its freshness is easy! Store any leftovers in an airtight container in the refrigerator for up to three days. If you want to keep it longer, you can freeze individual slices wrapped tightly in plastic wrap and then aluminum foil for up to two months. Just remember to let it thaw in the fridge before serving again for best results.
Pro chef tips for success
Here are a few insider tips to ensure your Cherry Blossom Dream Cake turns out perfectly every time:
- Use room temperature ingredients for better mixing and texture.
- Make sure not to overmix the batter; blend just until combined to keep your cake light and fluffy.
- Test the cakes at the lower end of the baking time to prevent overbaking, which can lead to a dry texture.
- If you’re feeling adventurous, try adding a sprinkle of almond extract to the batter for an extra depth of flavor.
Creative twists to explore
While the classic Cherry Blossom Dream Cake is already delightful, you can add your own touch! Consider adding chopped nuts for a crunchy texture, substitute the cherry blossom syrup with lavender for a different floral experience, or even incorporate lemon zest to brighten the flavor. These variations can help customize the cake to fit your taste preference or seasonal ingredients.
Your questions answered
1. How long does this cake take to prepare?
Preparing the Cherry Blossom Dream Cake takes about 20-30 minutes, plus baking time of 25-30 minutes, making it a quick baking project.
2. Can I make this cake ahead of time?
Absolutely! You can bake the cakes a day in advance, store them wrapped in the refrigerator, and frost them the following day.
3. Is there a gluten-free option available?
Yes! You can substitute the all-purpose flour with a gluten-free flour blend to make this cake gluten-free.
By following this detailed guide, you’re all set to create a Cherry Blossom Dream Cake that not only looks stunning but is sure to wow every palate. Happy baking!
Print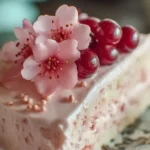
Cherry Blossom Dream Cake
- Total Time: 60 minutes
- Yield: 8 servings 1x
- Diet: Vegetarian
Description
A stunning dessert that combines delicate floral notes and luscious layers, ideal for springtime gatherings and elegant afternoon teas.
Ingredients
- 2 cups all-purpose flour
- 1 1/2 cups granulated sugar
- 1/2 cup unsalted butter, softened
- 1 cup milk
- 3 large eggs
- 1 tablespoon baking powder
- 1 teaspoon vanilla extract
- 1/2 cup cherry blossom syrup
- 1/2 cup cherry preserves
- 1 cup whipped cream for frosting
- Edible flowers for decoration
Instructions
- Preheat your oven to 350°F (175°C). Grease and flour two 9-inch round cake pans.
- In a mixing bowl, cream together the softened butter and sugar until light and fluffy.
- Add the eggs one by one, mixing well after each addition.
- Stir in the vanilla extract and cherry blossom syrup, letting the flavors mingle.
- In another bowl, whisk flour and baking powder. Gradually incorporate this into the butter mixture, alternating with the milk, until combined.
- Divide the batter evenly between the prepared cake pans.
- Bake for 25-30 minutes or until a toothpick inserted into the center comes out clean.
- Let the cakes cool in the pans for 10 minutes, then transfer to wire racks to cool completely.
- Once cooled, spread a layer of cherry preserves between the cakes, and generously frost the top and sides with whipped cream.
- Decorate with beautiful edible flowers before serving.
Notes
Store any leftovers in an airtight container in the refrigerator for up to three days or freeze individual slices wrapped tightly for up to two months.
- Prep Time: 30 minutes
- Cook Time: 30 minutes
- Category: Dessert
- Method: Baking
- Cuisine: American
Nutrition
- Serving Size: 1 slice
- Calories: 400
- Sugar: 35g
- Sodium: 200mg
- Fat: 18g
- Saturated Fat: 10g
- Unsaturated Fat: 6g
- Trans Fat: 0g
- Carbohydrates: 55g
- Fiber: 1g
- Protein: 5g
- Cholesterol: 80mg