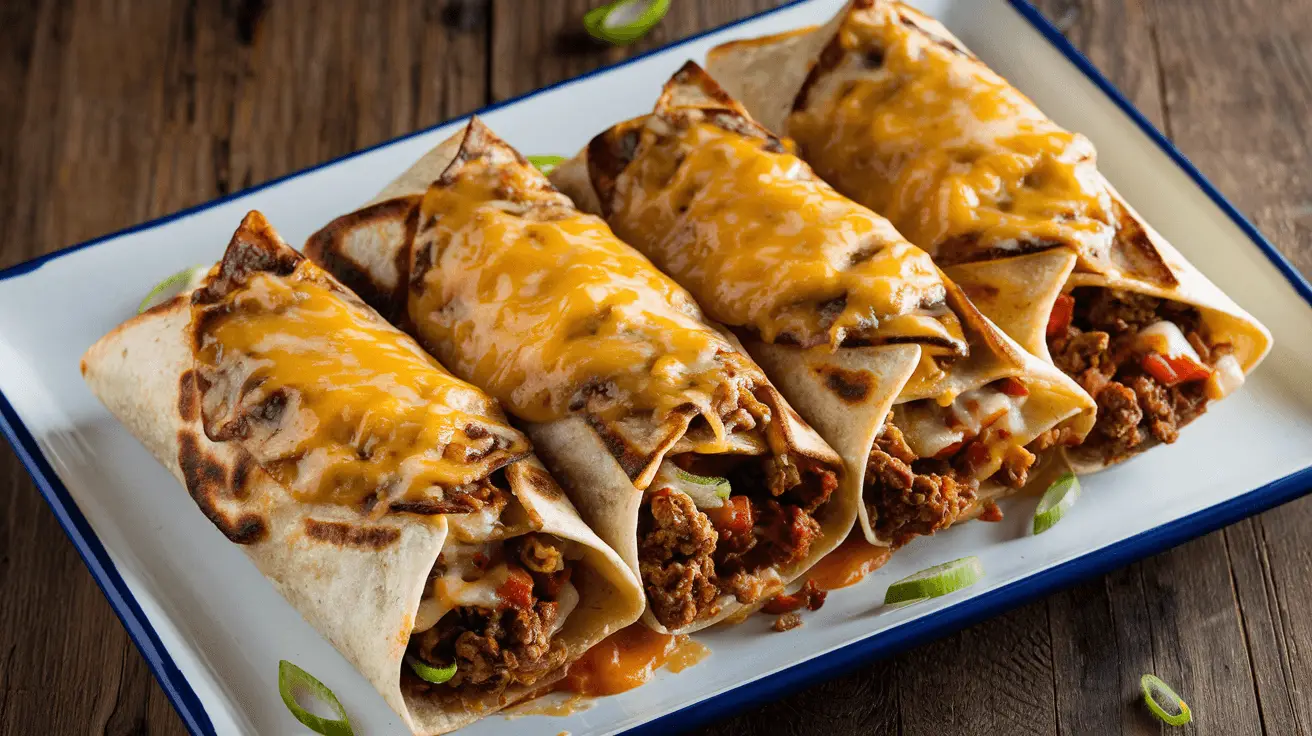
Who doesn’t love tacos? They’re versatile, customizable, and oh-so-tasty. But what if you could take your favorite taco to the next level by stuffing it with cheesy goodness? Enter Loaded Cheesy Pocket Tacos! This irresistible recipe is a fun and flavorful spin on the classic taco. With a warm, crispy shell packed with gooey melted cheese and a variety of tasty fillings, these tacos are bound to become your new go-to comfort food. Whether you’re hosting a party or just craving something delicious for dinner, Loaded Cheesy Pocket Tacos are the perfect choice.
Ingredients
Key Ingredients for the Tacos
To make the Loaded Cheesy Pocket Tacos, you’ll need a few basic ingredients that are easy to find at any grocery store:
Taco Shells: You can use soft flour tortillas or crunchy taco shells, depending on your preference.
Cheese: Shredded cheddar cheese or a mix of Monterey Jack and cheddar is ideal for a rich, gooey texture.
Ground Beef or Chicken: These proteins provide a hearty base for your taco filling. You can also substitute with ground turkey or a plant-based option.
Refried Beans: Adds creaminess and richness to the taco.
Sour Cream: For a tangy, smooth topping.
Shredded Lettuce: For crunch and freshness.
Tomatoes: Fresh diced tomatoes for a burst of flavor.
Onions: Diced onions bring a bit of sharpness to balance the flavors.
Taco Seasoning: A blend of spices to give the taco filling that authentic flavor.
Olives and Jalapeños: Optional, for an extra kick.
Optional Ingredients for Customization
You can also add a few optional ingredients to make your tacos truly your own:
Guacamole: Creamy and rich, perfect for topping your tacos.
Avocado Slices: For a buttery texture and added freshness.
Shredded Carrots or Cabbage: For an extra crunch.
Cilantro: Fresh cilantro will add a burst of color and flavor.
Directions
Step-by-Step Instructions to Make Loaded Cheesy Pocket Tacos
Prepare the Taco Filling:
Heat a little olive oil in a skillet over medium heat. Add the ground beef (or chicken) and cook until browned, breaking it up into small pieces. Stir in taco seasoning, and cook for another 2-3 minutes. Add refried beans and stir to combine. Set aside.Warm the Taco Shells:
Heat the taco shells in the oven or microwave, following the package instructions. If you’re using soft tortillas, warm them up in a dry skillet for about 30 seconds on each side to make them pliable.Add Cheese:
Sprinkle a generous amount of shredded cheese inside the taco shells. Place the shells in the oven for about 5-7 minutes, or until the cheese is melted and bubbly.Assemble the Tacos:
After the cheese has melted, take the taco shells out of the oven. Add the taco filling (meat, beans, and seasoning) to each taco shell. Top with fresh shredded lettuce, diced tomatoes, onions, and any other optional ingredients you like.Serve:
Add a dollop of sour cream and a few jalapeños or olives for extra flavor. Serve your tacos with your favorite sauces and sides.
Tips for the Perfect Tacos
How to Ensure the Cheese Melts Perfectly
The secret to perfectly melted cheese is to use a good blend of cheeses that melt well, such as cheddar and Monterey Jack. Also, placing the tacos in the oven with the cheese inside helps achieve that gooey texture. Make sure not to overfill the taco shells, as this can prevent the cheese from melting properly.
Choosing the Right Fillings for Your Pocket Tacos
When it comes to fillings, you can go wild with options. While the traditional ground beef or chicken works great, don’t shy away from trying other fillings like grilled veggies, carnitas, or shrimp. The key is to balance flavors—think about adding a bit of spice with jalapeños, sweetness with roasted peppers, or even some crunch with lettuce or cabbage.
Tips for Making the Perfect Taco Shell
If you’re using soft tortillas, it’s important to warm them gently so they don’t tear when you fill them. For crispy taco shells, bake them at a high temperature for a few minutes until they’re crunchy and golden.
Serving Suggestions
Best Sides to Pair with Your Tacos
Loaded Cheesy Pocket Tacos are hearty enough on their own, but they go great with sides like:
Mexican Rice: A flavorful rice that complements the spiciness of the tacos.
Refried beans: A classic side dish that complements tacos perfectly.
Guacamole and Chips: For dipping and snacking before your tacos.
Corn on the Cob: Grilled corn with a sprinkle of chili powder is a great side for tacos.
Delicious Sauces to Complement the Flavor
Try adding a variety of sauces to your tacos to elevate their flavor:
Salsa Verde: A tangy green salsa made with tomatillos.
Chipotle Sauce: A smoky and spicy option.
Creamy Cilantro Lime Sauce: A fresh and zesty topping for extra flavor.
Healthier Alternatives
If you’re looking to make your Loaded Cheesy Pocket Tacos a little lighter, there are several ways to do so without sacrificing flavor:
Use Whole Wheat Tortillas: These are a healthier option compared to regular tortillas.
Opt for Lean Protein: Swap ground beef for ground turkey or a plant-based protein for a lower-fat option.
Add More Veggies: Load up on fresh veggies like spinach, peppers, or zucchini to boost the nutritional value of your tacos.
Conclusion
Loaded Cheesy Pocket Tacos offer a fun and tasty spin on a classic dish, guaranteed to wow everyone. With melted cheese, flavorful fillings, and a customizable touch, these tacos are perfect for any occasion. Whether you’re cooking for your family or hosting a party, these tacos will be the star of the show. So, next time you’re in the mood for something cheesy and delicious, give this recipe a try—you won’t regret it!
FAQs
Can I make the taco shells in advance?
Yes, you can prepare the taco shells in advance and store them in an airtight container. Just reheat them before assembling the tacos.Can I use vegetarian options for the fillings?
Absolutely! You can use beans, grilled vegetables, tofu, or any plant-based protein for a vegetarian version of these tacos.How can I store leftover Loaded Cheesy Pocket Tacos?
You can store the leftovers in an airtight container in the fridge for up to 2 days. Reheat in the oven or microwave before serving.What can I use instead of sour cream?
You can use Greek yogurt as a healthier alternative to sour cream, or even guacamole for a creamy texture.Can I freeze Loaded Cheesy Pocket Tacos?
Yes, you can freeze the taco fillings and cheese separately. When ready to eat, just heat everything up and assemble your tacos.

Loaded Cheesy Pocket Tacos
- Total Time: 35 minutes
- Yield: 4 servings 1x
- Diet: Gluten Free
Description
Loaded Cheesy Pocket Tacos are a fun and delicious twist on a classic taco, packed with melty cheese, savory fillings, and crispy pockets that will delight your taste buds. Perfect for a quick and satisfying meal, these tacos are sure to become a family favorite!
Ingredients
1 lb ground beef or chicken
1 packet taco seasoning
1 cup shredded cheddar cheese
1 cup shredded mozzarella cheese
1/2 cup sour cream
1/2 cup diced tomatoes
1/4 cup chopped green onions
1/4 cup chopped lettuce
10 small flour tortillas
Olive oil for frying
1/2 cup salsa
1/4 cup guacamole
Instructions
- Begin by browning the ground beef or chicken in a skillet over medium heat. Break the meat apart with a spoon as it cooks. Once browned, incorporate taco seasoning and adhere to the package instructions.
- Next, arrange the tortillas flat on a clean surface. Spoon a generous amount of the seasoned meat mixture onto each tortilla. Sprinkle a lavish layer of shredded cheddar and mozzarella cheese on top.
- Carefully fold the tortillas into pockets, securing them with toothpicks to maintain their shape.
- Heat a generous amount of olive oil in a large frying pan over medium heat. Fry the taco pockets for 2-3 minutes per side, or until each side achieves a crisp, golden-brown texture.
- Once fried, remove the toothpicks and place the taco pockets on a plate lined with paper towels to absorb excess oil.
- Serve the tacos with a side of sour cream, diced tomatoes, fresh green onions, and crisp lettuce. Add a drizzle of salsa and guacamole for an extra burst of flavor.
Notes
- For a healthier version, you can swap ground beef with ground turkey or a plant-based alternative.
- Feel free to add extra toppings like avocado, guacamole, or your favorite hot sauce for added flavor.
- You can also use corn tortillas for a gluten-free version of these cheesy taco pockets.
- If you prefer a spicier taco, add chili powder or cayenne pepper to the taco seasoning mix.
- To make this dish ahead of time, prepare the filling and store it in the fridge for up to 3 days. Just assemble and bake the taco pockets when ready to serve.
- Prep Time: 15 minutes
- Cook Time: 20 minutes
- Category: Main Dish
- Method: Baked
- Cuisine: Mexican
Nutrition
- Serving Size: 1 taco pocket
- Calories: 520
- Sugar: 3g
- Sodium: 980mg
- Fat: 24g
- Saturated Fat: 10g
- Unsaturated Fat: 8g
- Trans Fat: 0g
- Carbohydrates: 40g
- Fiber: 3g
- Protein: 28g
- Cholesterol: 50mg

